Thursday, December 30, 2010

30 Minute Jacket

Another project for my to-do list for next year is this
30 Minute Jacket at Threads Magazine and the website indicated "Made from just a rectangle of fabric, this three-step jacket can be made in 30 minutes."

DENISE'S YUMMY PECAN CAKE


I love pecans, so of course when I spotted this recipe for Denise's Yummy Pecan Cake  by Denise at Shopper Strategy over at $5 Dinner Mom.   The best part of this is it sounds super easy as it uses Bisquick baking mix as the base with a tsp of vanilla and 4 cups of pecans.

For the complete recipe click here.

Picture:    $5 Dinner Mom

Monday, December 27, 2010

1951 Vintage Ripply Apron

As this apron takes less than a yard of fabric (although it take 3 1/2 yds of bias tape) and I love how it looks, this is one for sure I want to make this coming year. 

The style may be almost 60 years old, but it is so classic with fresh touches it will never truly be out of style.

This 1951 Vintage Ripply Apron is based an apron Woman’s Day, April 1951. 

The pattern and instructions are here over at Tipnut.


Picture:  Tipnut

Sunday, December 26, 2010

REINDEER FOOD AND PRINTABLE LABEL

Label from The Girl Creative - visit her site  here to download a copy.


This is one I probably won't use until I have Grandchildren in the future, but think it would be fun to sprinkle on a lawn on Christmas Eve.
 
When my son was little I made up "Reindeer Chow" which was somewhat of modified Chex Mix, but it was usually left indoors in a bowl (for Santa to take out) or a table on the patio.   It did add to the overall Christmas experience to make it a bit more magical and memorable.

I  like the idea of this recipe from over at The Girl Creative  for Reindeer Food  which is just 1/2 cup oatmeal, 1/2 sugar and 1/4 decorative sugars that you put in a small baggie and attach the adorable, downloadable label (above) that she has on her site here.

Chic Steals: DIY: Super-Easy $5 Holiday Wreath (from Present Bows)


With the after Christmas sales starting tomorrow and I going to pick up some extra packages of bows to make version of  Chic Steals: DIY: Super-Easy $5 Holiday Wreath (from Present Bows) to make next Christmas as I love how it looks.

For a picture of the wreath and the how-to click here.


Image: nuttakit / FreeDigitalPhotos.net

Friday, December 24, 2010

354 EDIBLE GIFT MIXES

The gift to the right is from my new supervisor and although it is a commercial product from Blondies Cookies, the concept is a cool gift idea.

One thing my Mom used to give me every Christmas as an adult was a jar of homemade hot chocolate mix and unfortunately I came across this post at Craftstew link for 354 Edible Gift Mixes at Everything Your Mama Made and More on Christmas Eve after the stores closed or I would have whipped up some last minute Christmas gifts, although this does gives me a year to test and tweak recipes.

The list doesn't have just beverage mixes, there are also soups, cookies, bread, snack and cake mixes.

If you would put together something like candy topped cookies on the left, it would be a good idea to copy their idea of putting the candies in the bottom - it is the only thing that has kept by son from eating them.

Saturday, December 18, 2010

Vegetarian Sausage

I love Morningstar Farms vegetarian sausages much better than actual sausage so have been on the prowl to try to find a good recipe. I didn't realize until I started searching that there were so many different options.

Suite 101 has an Easy Vegetarian Sausage using large mushrooms - I have had a portobello fajita before and it was hard to distinguish from steak, so it might have possibilities for faux sausage.


 Image: Sarah Topps / FreeDigitalPhotos.net


Annabel Karmel has a Vegetarian Sausage  recipe using breadcrumbs, onions and courgette.  I had never heard of  "courgette" so I had to look it up and per Wikipedia is Zucchini.


The Veggie Table has a recipe that is tofu based.


Cooks.com has a one that used one using texturized vegetable protein that seems like it would have more of the texture of sausage.


They all sound fairly easy to make - the hardest part will be figuring out which one to try first!

Sunday, December 12, 2010

PICKLED AND DEVILED EGGS

When I was young my Mom always made pickled and deviled eggs, but this creation form
Eye Candy - a Food Blog combines both.  Not only does it sound like it would have a interesting taste, it also makes for a lovely presentation with as the edges are ringed in purple giving it panache.

For the recipe visit click here.

Photo from  Eye Candy - a Food Blog

Saturday, November 27, 2010

Cinnamon Spiced Candied Walnuts

One of my favorite baking sites,  Baking Bites  has a yummy sounding recipe for Cinnamon Spiced Candied Walnuts that sound like they will make a delicious Christmas snack, but the best part is that they only a few ingredients and look like they will be easy to make.

For the recipe, visit Baking Bites here.

Photo from Baking Bites

Thursday, November 25, 2010

ICE CREAM SANDWICH CAKE


I read of this creation on 
Mommy's Kitchen 
where ice cream sandwiches are the base, then you top it with whipped topping, hot fudge ice cream toppings and then either crushed up Oreo's or Whoppers.  This sounds like it would be a fun summer treat and going to try it when the weather gets warm again.

For the recipe, visit Mommy's Kitchen .

Sunday, November 21, 2010

Michael Kors "Grandma Bea's Pineapple Upside Down Cake


I love pineapple upside down cake and can't wait to try Michael Kors Grandma Bea's Pineapple Upside Down Cake as seen on Martha Stewart.

"Makes one 9-inch round cake
  • 1 (20.5-ounce) can pineapple rings in juice
  • 3/4 cup (12 tablespoons) unsalted butter
  • 1 cup lightly packed light-brown sugar
  • 1/3 cup chopped pecans (optional)
  • 1 1/2 cups all-purpose flour
  • 1 teaspoon baking powder
  • 1/2 teaspoon coarse salt
  • 4 large eggs
  • 2 large egg yolks
  • 1 1/2 teaspoons pure vanilla extract
  • 1 1/2 cups granulated sugar

Directions

  1. Preheat oven to 325 degrees.
  2. Drain pineapple rings and discard juice. Place pineapple on a paper-towel-lined plate to drain, turning once, for 5 minutes.
  3. Melt 6 tablespoons butter and transfer to a 9-inch round cake pan to evenly coat bottom; sprinkle brown sugar evenly over bottom of cake pan and top with an even layer of pineapple rings and pecans, if using. Set prepared cake pan aside.
  4. In a large bowl, whisk together flour, baking powder, and salt; set aside. In a small bowl, whisk together eggs, egg yolks, and vanilla until well combined; set aside.
  5. In the bowl of an electric mixer fitted with the paddle attachment, beat remaining 6 tablespoons butter with granulated sugar on medium-high speed until light and fluffy. Reduce speed to low and add flour mixture alternating with egg mixture; beat until batter is just combined.
  6. Pour batter in prepared cake pan and transfer to oven. Cook until a cake tester inserted into the center comes out clean, about 1 hour and 10 minutes. Transfer to a wire rack to cool for 10 minutes.
  7. Run a small sharp knife around edge of pan to release cake. Place a plate on top of cake pan and invert cake onto plate; serve.
From The Martha Stewart Show, November 2010"

Read more at Marthastewart.com and see the video atGrandma Bea's Pineapple Upside-Down Cake - Martha Stewart Recipes

Sunday, November 14, 2010

Michele Albano's Maple Pumpkin Pie with Pecan Streusel

http://www.foodnetwork.com/recipes/michele-albanos-maple-pumpkin-pie-with-pecan-streusel-recipe/index.htmlI don't normally like pumpkin pie - I like the flavor but it is too mushy and blah.  But I watched "The Iron Chef" the other night and absolutely love the idea of Michele Albano's Maple Pumpkin Pie Pecan Streusel that has a solves that problem as it has a crunchy streudel topping.

The recipe is over at the Food Network here and they even the option to print 3x5 or 4X6 "cards" you can put in a recipe file.

Monday, November 8, 2010

Cinnamon Swirl Pancakes with Buttermilk Syrup

I spotted this recipe at the The Idea Room and is sounds more like a treat than a breakfast item.  Going to try this some time.
Cinnamon

For the recipe, click here.

BOOK BINDING TUTORIALS

Craft Stew has a nice roundup of different ways to How To Bind A Book including different types of books and methods that I plan on investigating further if I ever get time to try out scrapbooking.
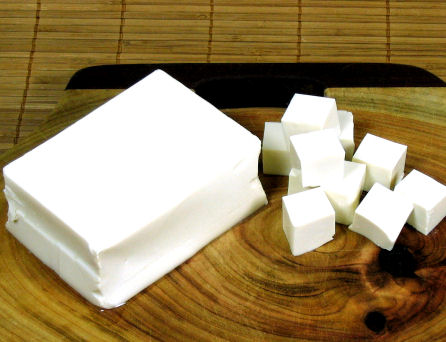

Sunday, November 7, 2010

Mascarpone Cheesecake With Cap'n Crunch and Tarragon Sugar

I just watch "Top Chefs:  Just Desserts" Episode 8 which had for the elimination challenge where the contestants where the challenge was to create desserts for a "Celebratea" party and the desserts had to represent a celebrity duo.

While it is cool to see what they come up with, most are too time consuming or expensive for me try to make, but I fell in love with  Zac Young's dessert that is to represent Julie Andrews, Mascarpone Cheesecake With Cap'n Crunch and Tarragon Sugar.   I absolutely love the idea of Cap'n Crunch as the base and the Tarragon Sugar is a unique twist that I want to try.


Photo from website


Here is the recipe from Top Chef: Just Desserts - recipe by Challene Winner Zak Young

"Ingredients

Captain Von Trapp Crunch Tart Shell:
  • 8 ounces Captain Crunch (finely ground)
  • 5 ounces flour (all purpose)
  • 3 ounces sugar
  • Pinch salt
  • 8 ounces butter (melted)
Mascarpone Cheesecake:
  • 8 ounces cream cheese
  • 4 ounces sugar
  • 3 eggs
  • 1.5 teaspoon lemon zest
  • 1 tablespoon lemon juice
  • 1 teaspoon vanilla extract
Tarragon Sugar:
  • 15 leaves of tarragon (fresh)
  • 1/2 cup Turbinado sugar

Directions

Captain Von Trapp Crunch Tart Shell:
1. Mix dry, stir in butter.
2. Press into 1.5” mini tart shells (or mini cake tins) in a thin layer.
3. Freeze for one hour.
4. Bake at 325 for 15min.
5. While still warm, reshape shells up sides of pans.
Mascarpone Cheesecake:
1. Cream the cream cheese and sugar and eggs at one time.
2. Add juice and zest and extract.
3. Add mascarpone
4. Perfect emulsion with hand blender.
5. Fill tart shells with batter and bate at 300 degrees F with low fan for about 20min (till firm).
6. Cool, refrigerate till firm.
Tarragon Sugar:
1. Dry tarragon in 250 degree F oven for about 10 minutes.
2. Process with sugar in Robot coupe.
Assembly:
1. Sprinkle tarragon sugar over tart."

For more information on the show, the contestants and other recipes click here.

Thursday, November 4, 2010

Zesty Pepperoni Spread

One of my new fav sites is  Snack Picks and I am looking forward to trying this quick and easy Pepperoni Dip

"Zesty Pepperoni Spread

Preparation Time: 10 minutes
Total Time: 70 minutes
Servings: 8

 Ingredients

4 ounces (1/4 pound) stick pepperoni
1 package (8 oz.) cream cheese, softened*

Cherry tomatoes, halved

Crackers Keebler® Town House® Original
Directions
1. Remove casing from pepperoni. Cut two slices for garnish. Set aside. Slice remaining pepperoni into 1-inch pieces. In blender or food processor container process pepperoni pieces, a few pieces at a time, until crumbly.


2. In small bowl stir together pepperoni and cream cheese. Refrigerate at least 1 hour to blend flavors.


3. Let stand at room temperature for 1 hour. Garnish with pepperoni slices and cherry tomatoes. Serve with crackers.


*NOTE: Soften cream cheese in microwave at high for 15 to 20 seconds."


They also have printable 3x5 recipe cards and also option of 4x6 or a full page.

Monday, October 18, 2010

CANDY CORN RICE CRISPIES TREATS


I found this over at Lick The Bowl Good...it is Rice Krispies where the bottom and middle layers have been dyed using food coloring yellow and orange then cut to resembe candy corn.  As my son loves Rice Krispies so I will try this soon.  

Photo from Lick The Bowl Good

Saturday, October 16, 2010

SPIDER SHIRT

Charlotte Letters  has a tutorial to make a spider shirt using the above as an applique.   This would be cute for Halloween or any kid that loves spiders.  I think I am going to spook out my girly "Tink" boyshorts that I got a Walmart for $1 with this creepy gem.

HELLO GOODBYE ELEPHANT STAMP


Hello Goodbye, originally uploaded by Tresijas.\

I love this cute little elephant!   Flickr user Tresijas indicates it is based on a vintage 70's wallpaper pattern. 

I don't have any immediate use for this so it is for a "someday" project - would be cute to make wrapping paper with.

Monday, October 11, 2010

MOTORCYCLE FREEZER PAPER STENCIL

It is hard to find cute, yet simple designs for boys, but The Tao of Craft  nailed it with the above freezer paper stencil.

This is going on my someday list as this would also be cute for a baby onesie baby shower gift the it is known that the little one is going to be a boy.

Sunday, October 10, 2010

Michelma's Dragon

Over at The Rhythm of The Home there is a pattern and tutorial for a cute little dragon, called Michelma's dragon here.

For further explanation on its name, click the hyperlink above. 

While he is not going on a project list for the near future, at some point in time I want to make him to put into the "Grandma Box" for future grandchild(ren). 

Saturday, October 9, 2010

TIE TO BELT TUTORIAL


I saw this Tie To Belt Tutorial over at  Dragonfly Designs today and it is hard to refrain from raiding my son's closet for an old tie to try this out on. 

I am a follower of her blog and she has all sorts of interesting things - you can check out her blog by clicking below.


Dragonfly Designs

Thursday, October 7, 2010

Angie's Homemade Donuts

 This yummy recipe is by Angie Atchley (her blog is Vivo Bello) posted at one of my favorite meal inspirations sites $5 Dinner Mom.

It is fun and simple.  Just need:
  • 2 Tubes of Biscuits
  • Vegetable Oil
  • Granulated Sugar
  • Cap off of 20 oz plastic bottle (to cut the hole in the buscuit)
  • Paper Towels
  • Plastic bag
Here are the instructions from over at  $5 Dinner Mom.

 "
1) Line up the biscuits assembly line style.
2) Use a cap from a 20oz soda (or something similar) to make a hole in the center of the biscuits.
3) Heat 3 inches of oil on medium/high.
4) Place donuts and donut holes in the oil for about a minute on each side, until golden brown.
5) Remove from oil and place on a paper towel to soak up the excess oil.
6) Give each child a small bag with some sugar in it, add the warm donuts to the bags and let them shake, shake, shake until the donuts are coated!"

Sunday, October 3, 2010

Leaf Skull Rubbing

I saw this Leaf Skull Rubbing tutorial over at Craft Lady Abby, who is a fellow "Countdown To Halloween" blogger and know I want to give this a try as it looks like fun and produces a unique results.

Friday, October 1, 2010

TGI FRIDAY'S VANILLA BEAN CHEESECAKE

We had dinner at TGI Friday's and I order the "Choose 3 for $12.99" and for dessert I had ordered the Chocolate Peanut Butter Cheesecake, but they brought this out by mistake and they were busy, so we just decided to go ahead and give it a go, and boy am I a glad that we did!  It was to die for.  

We just got home and I went in search of a copy cat recipe and found the following on Facebook and I plan on trying to make this in the near future.

http://www.facebook.com/topic.php?uid=229974955312&topic=10277
Vanilla graham cracker crust, vanilla bean cheesecake, white chocolate mousse, vanilla bean whipped cream.


CRUST:
1 1/2 cups finely crushed graham crackers
1/4 cup sugar
1/2 cup butter, melted
1 egg yolk, beaten
1/4 teaspoon vanilla

Crush the graham crackers. Mix in the sugar. Add the egg yolk and vanilla, then stir in the melted butter. Line a springform pan with non-stick foil. Press graham crackers into the pan. Bake at 375º for 8 minutes or until edges are slightly brown. Remove and let cool.

CHEESECAKE:
16 ounces cream cheese, softened
1 cup sour cream
2 Tablespoons corn starch
1 cup sugar
2 Tablespoons butter, softened
1/2 teaspoon vanilla
vanilla beans from one pod

Combine cream cheese, sour cream, corn starch and sugar, mix until sugar is dissolved. Add butter, vanilla and beans, blend until smooth. Don’t overmix.

Bake at 350F 30 to 35 minutes. Cool 1 hour.

WHITE CHOCOLATE MOUSSE
1 cup whipping cream
2 Tablespoons powdered sugar
4 ounces 1/3 less fat cream cheese, softened
4 ounces white chocolate baking squares, melted

In a cold mixing bowl beat cream until soft peaks form. Gradually add powdered sugar until stiff peaks form. Put this in a bowl in the fridge. Don’t wash your mixing bowl, beat the cream cheese in it, until fluffy. Add the white chocolate and beat until smooth. Fold in the whipped cream.
VANILLA BEAN WHIPPED CREAM

1 cup whipping cream
1 Tablespoon powdered sugar
Beans from one vanilla pod

In cold mixing bowl, beat whipping cream until soft peaks form. Gradually add powdered sugar and then vanilla beans, beating until stiff peaks form.

After the cheesecake has cooled spread the mousse evenly on top. Refrigerate for about an hour then spread the whipped cream on top. Refrigerate several hours before serving.

Saturday, May 1, 2010

Make him, I must! Crocheted Yoda


While my Mom was like the Yoda of crochet, I did not inherit that talent and do not have Luke Skywalker potential in that area, but as soon as I saw him I knew he must go on my "Stuff to Do" because at some point I am going to try to master this little Yoda that Jessica at Happy Together generously came up with a tutorial at on her blog http://ohsohappytogether.blogspot.com/2010/04/little-yoda-crochet-tutorial.html

Sunday, February 21, 2010

Strawberry Mojito Cookies


These Strawberry Mojito Cookies over at Smashed Peas and Carrots are going on my to make list for a summer treat.

Recipe and picture from:
http://peaslovecarrots.blogspot.com/2010/02/memories-of-sunshine-strawberry-mojito.html
"1/2 pound unsalted butter (softened)
2/3 cup granulated sugar
1 large egg (room-temperature is best)
2 teaspoons vanilla extract
Zest of 1 lime
1/2 teaspoon cinnamon
1/4 teaspoon baking powder
1/8 teaspoon salt

For the glaze...
1 pint fresh strawberries
1/2 cup sugar
1/4 cup white rum
1/2 cup water
Small handful fresh mint leaves, minced fine

What to do with it all...
Cookies: Beat together butter and sugar on medium speed until light and fluffy.  Add all other ingredients except flour and beat until well combined.  Reduce mixer to low and add flour slowly until well combined.  Divide dough in half and wrap and put into fridge to chill for 20 minutes.

Preheat oven to 350 degrees.  Remove one half and place on a well-floured rolling surface.  Roll out to 1/4 inch thickness.  Cut out cookies with about a 3-inch cutter (or use a tin can!) and place on a cookie sheet lined with parchment or a silicone mat 1 inch apart.  Bake on mid or upper rack for 6 - 8 minutes or until golden.  Repeat with second half of dough.  Set aside cookies to cool.

Glaze: In a medium saucepan, heat all ingredients except mint on medium, stirring occasionally until strawberries are soft and giving off color into liquid.  If there is too little liquid, just add a little more water.  Puree mixture with emulsion blender or standard blender and return to saucepan.  Simmer until thick.  Allow to cool slightly, then add a tea spoon's worth of glaze to each cookie and spread until shiny and lovely.

Finish with powdered sugar if desired."

Friday, February 19, 2010

Faux Fireplace Screan

I love the faux fireplace over at How To Do Something

It was inspired by a screen at Crate and Barrel that is $200 - is hard to believe this was made for $20!Instructions on how to make it are here. http://howtodosomething.blogspot.com/2010/02/how-to-make-faux-fireplace-screen-dress.html

Thursday, February 18, 2010

New Blogger Background - Sugar and Spice


I changed the background on my actual craft blog Crafts and Creations with KMOM14 to "Tied To You" by , which is a free background and I liked the creations so much that I decided to change the background for this blog also.  The background has been changed to Truly Madly Deeply from the Valentines Day collection and I changed the layout in blogger to "Rounder 2" to coordinate the foreground colors to with the lovely new background.   If you are looking for a new background for you blog, I recommend checking out Sugar and Spice as it is is super easy to change without worrying about messing up the entire blog as you post the code in the HTML/Java Script under gadgets.  

Wednesday, January 27, 2010

Small Lying Cat Bag


(Photo by nuno-runo blogspot.com)

I love this little cat purse over at  Nuno Life and there is a pattern and instructions on how to make it.  I think I might make it as a makeup bag without the straps for my friend Beth.
http://nuno-runo.blogspot.com/2010/01/cat-bag.html

Tuesday, January 26, 2010

Appetizer Wishlist


No, this isn't one I want to try - my son loves them but I hate the smell of them.  

There are appetizers that I want to try before my son graduates high school in 2012 as I want to come up with some good but unique things to serve for his graduation party to be served alongside the Funyuns, Cheese Curls and Doritos that I know he will want to have.   Man cannot live by Funyuns alone.


Walnut Pesto over at Smitten Kitchen - the combination of walnuts, parmesan cheese, sun-dried tomatoes, garlic with a dash of sherry vinegar sounds like it would be a unique and tasty appetizer on small french bread rounds or baguette.

Parmesan Cream Crackers also over at Smitten Kitchen - I had never thought about making crackers before - how cool it would be to serve them and say "I made them myself!".  It sounds doable enough - flour, cream, parmesan, salt and butter blended in a food processor to make a dough then roll out, cut, poke and bake - at least that is my fantasy.

Saturday, January 16, 2010

Calabacitas (Mexican-flavored vegetable side dish)

This recipe came in a newsletter that I subscribe to World's Healthiest Foods that I would like to try sometime as I like all the ingredients raw - will have to see if I like them as well cooked, or maybe try making it raw with the olive oil, garlic and chicken broth cooked as a dressing.


"Calabacitas

Prep and Cook Time: 20 minutes
Ingredients:
  • 1 medium onion, cut in half and sliced thin
  • 4 medium cloves garlic, chopped
  • 2 cups zucchini , diced into ½ -inch cubes
  • 2 cups yellow squash, diced in ½-inch cubes
  • 15 oz can diced tomatoes, drained
  • 4 oz can of diced green chili
  • 1 TBS + 3 TBS chicken or vegetable broth
  • ¼ cup chopped cilantro
  • 3 TBS fresh chopped fresh oregano (or 1 TBS dried oregano)
  • salt and black pepper to taste
  • *Optional: drizzle with olive oil before serving
Directions:
  1. Slice onion and chop garlic and let sit for at least 5 minutes to bring out their health-promoting benefits.
  2. Prepare all the vegetables.
  3. Heat 1 TBS broth in 11-12 inch stainless steel skillet. Healthy Sauté onions in broth over medium heat for about 5 minutes stirring frequently, until translucent. Add garlic and sauté for another minute.
  4. Add zucchini, yellow squash, remaining broth, green chili, and cook for another 3 minutes or so until vegetables are tender, stirring often. Add tomatoes and continue to cook for another couple of minutes.
  5. Stir in herbs, salt, and pepper. Serves 4"